How to make a clip for YouTube, Facebook and other social networks

By Olga Krovyakova - modified June 14, 2024, created March 29, 2019
When we would like to share some funny, interesting video clips with our friends via YouTube, Facebook and other social networks, sometimes there is the need to edit the video before uploading. Most times we would like to have only some certain fragments or part of video or audio content of the clip or movie.
To edit the file before the sharing it via YouTube or Facebook you can use, for example, lossless and fast SolveigMM Video Splitter, that edits files of all popular formats, e.g. MP4, FLV, MOV, AVCHD, MPEG-2, MKV, MPEG-1, AVI, WMV, MP3, WMA, and helps to make such clips in the couple of minutes.
Just follow these simple steps to take a chance to excite your friends with the new clip.
Assume, we would like to delete the fragments several parts of the fragment and save two fragments from the file to the single video clip.
1. Download and install Video Splitter
2. Launch the program from its icon or from the Start -> All apps -> Solveig Multimedia -> SolveigMM Video Splitter.
3. Open the original input file from which you would like to get the fragment.
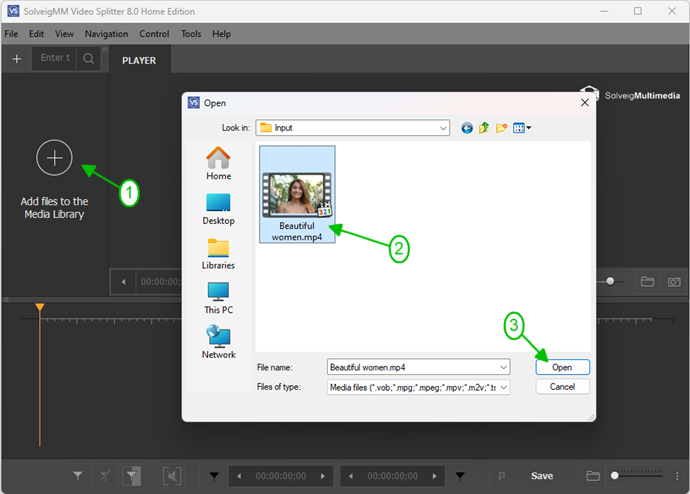
Picture 1
3. Move the file from the Media library to the timeline.
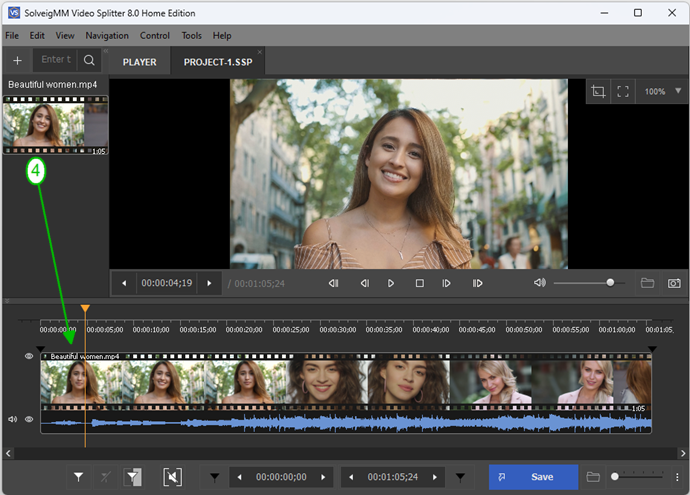
Picture 2
4. Select start and end time positions using slider and markers. Navigate the slider to the fragments beginning; select the “Add marker” button to place the marker of the fragment’s beginning on the timeline.
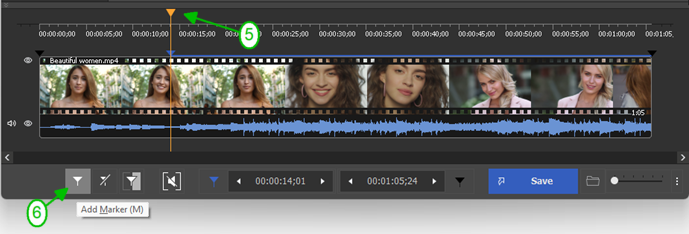
Picture 3
Note: you can zoom the timeline by selecting the comfortable for you scale by pressing the special zoom button or by navigating the cursor on the thumbnails then rotating the mouse wheel.

Picture 4
5. Then move the slider to the fragments end position and again click the “Add marker” button or “M” hot key.

Picture 5
6. Move the slider to the area between markers to select the fragment that will be deleted. Its color will be changed to orange.
Press the “Cut out selected fragment” button.

Picture 6
7. Then move the same way the slider to the next fragment that will be deleted and click again this button or “D” hot key. You can also right mouse click on the fragment and in the combo box window select the appropriate “Cut out selected fragment” menu.
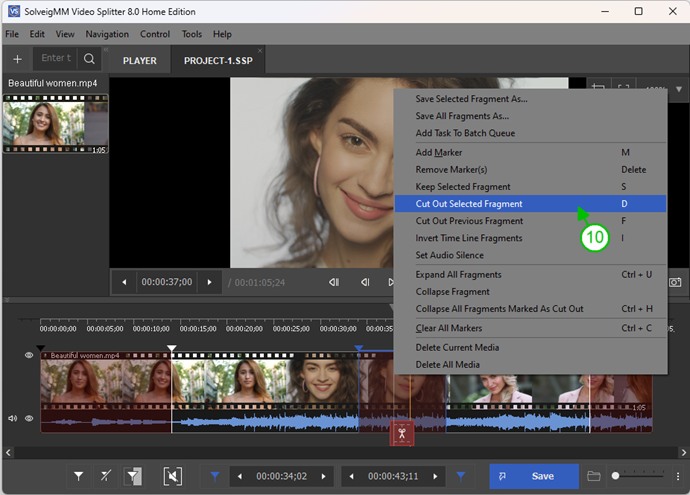
Picture 7
8. Finally you will get the view of timeline where only two fragments are selected for saving.
Click the "Save" button.
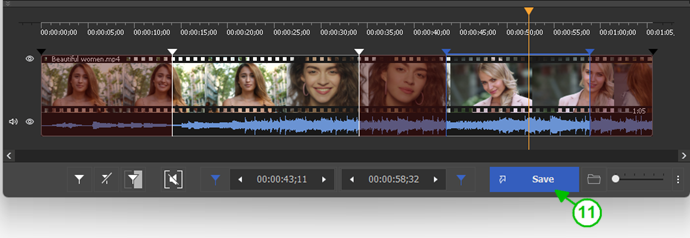
Picture 8
9. In the opened dialog window select the folder to save your output file, enter the name for your file and click the "Save" button.
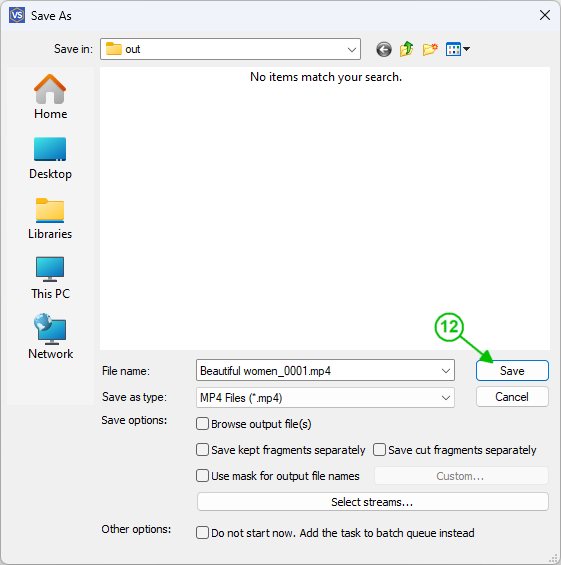
Picture 9
The editing progress will be started. At the end you will get the ready-for-uploading clip for YouTube, Facebook or another social network.
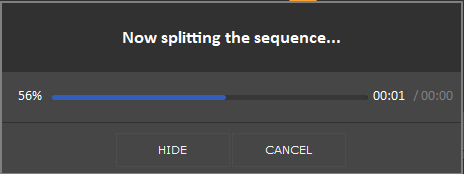
Picture 10
Good luck with your editing projects!
- https://www.solveigmm.com/en/howto/how-to-edit-mp4-file-with-video-splitter/
- https://www.solveigmm.com/en/howto/how-to-mute-sound-on-the-required-places-of-your-video-clip-with-video-splitter/
 Olga Krovyakova is the Technical Support Manager in Solveig Multimedia since 2010.
She is the author of many text and video guidelines of company's products: Video Splitter, HyperCam, WMP Trimmer Plugin, AVI Trimmer+ and TriMP4.
She works with programs every day and therefore knows very well how they work. Сontact Olga via support@solveigmm.com if you have any questions. She will gladly assist you!
 Eng
Eng  Rus
Rus  Deu
Deu  Ital
Ital  Esp
Esp  Port
Port  Jap
Jap  Chin
Chin