![]()
Screen Notes Settings
The settings of screen notes are grouped into two parts - Screen Notes Settings Bar and Screen Notes Setup Dialog.
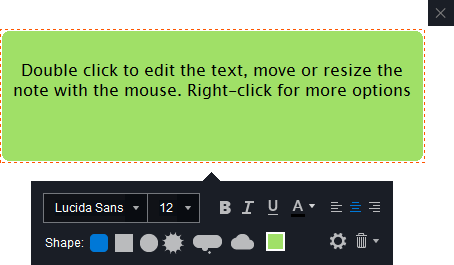
The Screen Notes Settings Bar appears when you double click the screen note to edit its text. In Screen Notes Settings Bar you can change the text formatting - the font attributes, color, size, style. Also you can change the shape of a note and its backgroung color.
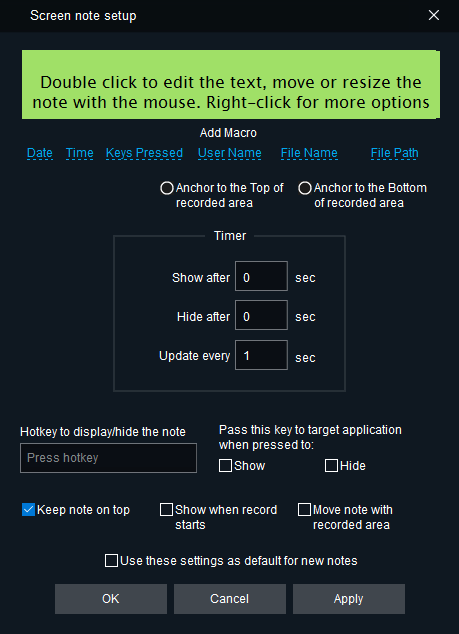
In the Screen Notes Setup Dialog you can change the screen note behavior, select a hotkey for current screen note and also add some of the predefined macros to a text of the screen note.
The changes you make in the Screen Notes Settings Bar applied right away and the changes in Screen Notes Setup dialog applied after you click the OK or Apply button.
By default, new note boxes have the Keep note on top option selected. This prevents the note box from being covered by other windows. You can disable this option using the Keep note on top checkbox.
If you pan the area being recorded, you may want your note box to move with it so that it appears as if it does not move in your movie. You can enable the Move note with recorded area option for that.
You can assign the hot key that will show and hide the note. To select such a hot key or a combination of keys, click in the "Press hotkey" box, and press the key or key combination. The combination may be any regular key pressed together with the Shift, Control or Alt keys. Normally, if HyperCam intercepts a hot key that activates or hides a note, this key will not be passed to the target application. However, you may decide otherwise by selecting one of the options below the hot key box. Example: suppose you are recording a program that opens the Help window after the F1 key is pressed. You can create a small note that says "F1 pressed" and place it in the corner of your recorded frame. Also select the "Pass this key to target application when pressed to: Hide note" option. Now start recording and press the F1 key, the Help windows does not appear, instead our note saying "F1 pressed" shows up. Now press F1 again, the note disappears and the Help window of the target application appears.
You can set the timer to automatically hide the note after some time or update its text (for example, insert the %time% macro into the note text and make it update every second to have a digital clock on the note). The "Timer"=>"Update Every" option allows you to do that. You can use decimal fractions for timers shorter than 1 second, e.g. 0.5 second will make the timer act every half a second or 500 ms.
The settings right below the note text box include macros insertion and note alignment anchors.
Navigate to the necessary position in text and left-click the macro to add it into the text. The following macros are available: date, time, the actual keys you press, the username or the recorded AVI filename and path. For example, the %key% macro will be replaced in the note text with the actual keys pressed at the time the note text is updated, such as "Ctrl+Shift+W". To have keys updated whenever you press them and cleared when you do not type, you also need to enable the timer described above.
You can also align the note exactly to the top or bottom of your video frame by selecting one of the Anchor radio boxes.
You can use the font, color and other settings of the current note as defaults for creating new notes. Select the Use these settings as defaults for new notes checkbox to do it.